How to measure the roundness?
The roundness measurement is quite essential for many applications. It has several different methods, including simple caliper measurement and high-precision special roundness measurement system. This article will show the definition of roundness, roundness standards and several common methods of roundness measurement.
How to define roundness?
·A circle is defined as a closed curve with a constant radius from a point (center).
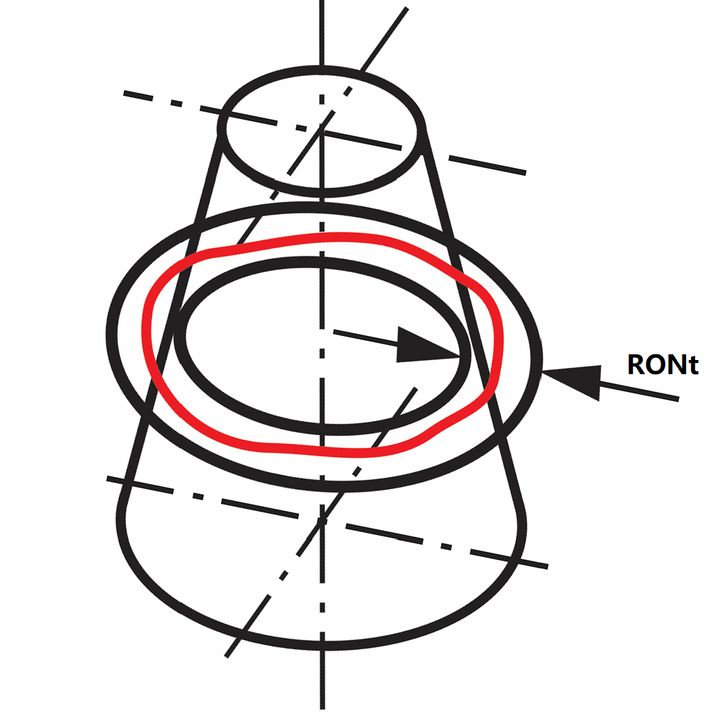
·Roundness refers to the degree to which the cross section of the workpiece is close to the theoretical circle.
·Roundness is a value used to quantify the circular error, i.e. the distance from the center of the circle.
·More precisely, roundness can be considered as "Un-circularity".
Roundness standards:
Many different international standards, national standards, local and industrial standards have relevant roundness standards, such as the following two ISO standards:
- ISO 1101 : 2017
Defines roundness as the radial separation of two concentric circles that exactly contain a roundness feature
Drafting standard: describes roundness and the related identification of roundness measurement and analysis
- ISO 12181 : 2011 (two parts)
Provides definitions of circularity parameters
Introduces the different reference circles
Why measure roundness?
Round cross-sections are one of the most dominant and basic forms of industrial components. Round sections occur in many applications, particularly on bearing surfaces such as rotating shafts and ball bearings. Measuring out-of-roundness (often referred to simply as "roundness") is an extremely important assessment method. If the roundness of a rotary bearing component is poor, this often results in noise and is likely to lead to premature failure. Accurate roundness measurements are therefore essential to ensure the functionality of such components.
How to measure roundness?
Below you will find a few common roundness measurement techniques and methods.
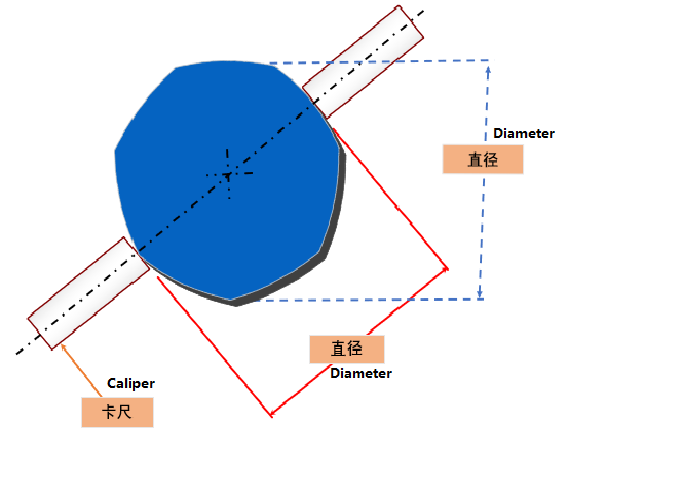
Diameter measurement method (two-point method):
Perhaps the first and easiest way to determine the roundness of a part is to measure its diameter in several different directions to see if it is equal. If roundness is a cosmetic requirement rather than a functional one, then measuring the diameter is sufficient.

V-block measurement method (three-point method)
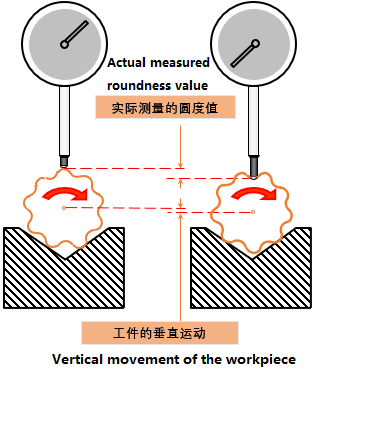
Another frequently used method of determining roundness is to place the part to be measured in a V-block and rotate it in contact with a micrometer or similar indicator. This is essentially a three-point method, rather than the two-point method described above. If the part is indeed round, the irregularity is negligible and the pointer of the indicator will not move.
An error in shape will cause the micrometer to show a reading, however the part will also move up and down when the irregularity touches the V-block. In addition, when measuring shaft parts, contact with the V-block is not limited to the plane being measured. This means that irregularities in the part along its radius will affect the micrometer reading. The limitation of the three-point method is that the results may vary depending on the V-angle and the spacing of the irregular features.

Coordinate measuring machine method (CMM)
An alternative method of measuring roundness is to use a Coordinate Measuring Machine (CMM). A standard CMM has three precise orthogonal axes and is equipped with a touch-sensitive sensor. The sensor makes contact with the part to be measured and records its position. This method takes several points around the workpiece and then combines them in the computer to work out the roundness of the workpiece. Typically, the number of points sampled is very small due to the length of time it takes to collect the data points. As a result, this method of measurement is often not accurate enough.

Rotary datum method
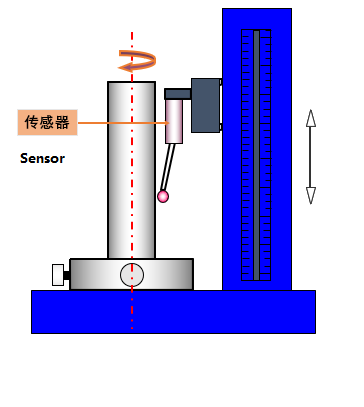
The most accurate method of determining the roundness of a part is to measure the change in radius relative to a precise rotating datum using a probe scan, which remains in contact with the surface of the part and collects a high density of data points. From this data a circle is then fitted and its circularity calculated.
There are a number of instruments specifically designed to measure circularity. The most common configuration is a system containing a rotary table on which the workpiece is mounted. The sensor is mounted on a radial measuring arm which can be adjusted to bring the sensor into contact with the workpiece. The radial arm itself is mounted on a column that allows the height of the measuring plane to be adjusted.
The linear axis of these instruments has a high degree of form accuracy, allowing the instrument to be used to measure other parameters such as flatness, straightness and cylindricity. The advantage of these instruments is that roundness can be measured very accurately in a very short measuring time.

For more information about Wilson Roundness Machines, please visit: www.wilsonxa.com


 -
-  +86 13087559846